

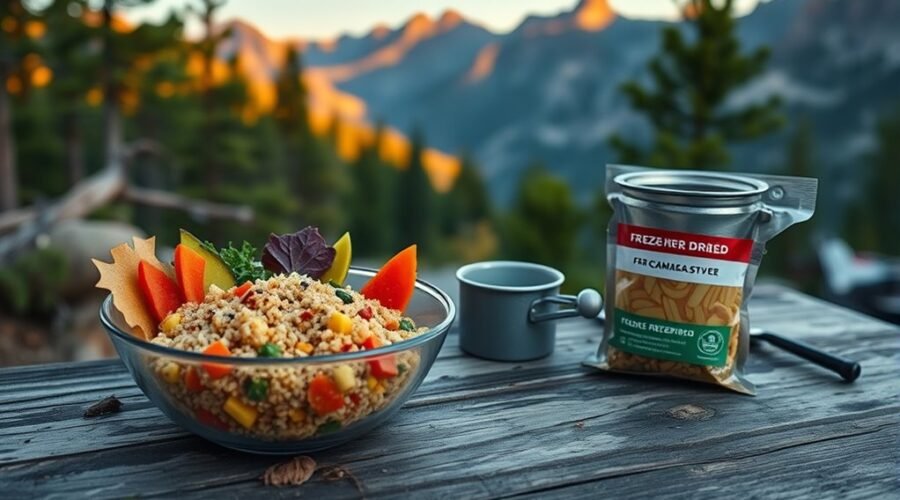
Good backpacking meal ideas should give you enough energy without filling your pack with heavy food or complicated cooking gear. Quinoa salad packets and dehydrated curry meals are two practical options for backcountry trips. They offer different advantages in preparation, water use, nutrition, and cleanup, so the right choice depends on your route and cooking setup.
Quick Answer
Choose quinoa salad made with ready-to-eat ingredients for a simple, no-cook lunch. Dehydrated curry with instant rice or precooked lentils makes a satisfying hot dinner. Add nuts, seeds, or olive oil for extra calories. For longer trips, plan portions around your energy needs, available water, cooking fuel, and safe food storage.
Key Takeaways
- Ready-to-eat quinoa works well for cold meals, but ordinary dry quinoa needs proper cooking.
- Dehydrated curry saves carrying weight but requires water and enough time to rehydrate.
- Olive oil adds concentrated energy to meals without requiring cooking.
- Home-dried food needs proper preparation, drying, packaging, and storage.
- Calculate food weight, drinking water, meal water, and stove fuel together.
Quinoa Salad vs. Dehydrated Curry: Which Backpacking Meal Is Better?
Quinoa salad suits hikers who prefer a cool meal without lighting a stove. Dehydrated curry suits those who want a warm, filling dinner after a long hiking day.
Neither option is automatically lighter or more nutritious. The ingredients, serving size, packaging, and water requirements determine how practical each meal will be.
| Factor | Quinoa Salad | Dehydrated Curry |
|---|---|---|
| Best use | Quick lunch or no-cook dinner | Warm camp dinner |
| Preparation | Mix ready-to-eat ingredients or rehydrate a suitable dried mix | Add hot water and allow ingredients to soften |
| Equipment | Spoon and food container | Stove, fuel, water container, and spoon |
| Water needs | Little or none for ready-to-eat packets; more for dried ingredients | Enough to rehydrate the complete meal |
| Main advantage | Fast preparation without cooking fuel | Compact dry ingredients and a warm meal |
| Main limitation | Moist prepared ingredients may require refrigeration | Needs water, time, and usually stove fuel |
When Should You Choose Quinoa Salad?
Choose quinoa salad when you want a quick lunch, especially on a warm day or when you prefer not to stop for cooking. Use commercially prepared shelf-stable quinoa, or prepare a suitable dried meal in advance.
Combine the quinoa with dried vegetables, seeds, herbs, and olive oil. Shelf-stable tuna or another packaged protein can make the meal more substantial.
Check the product instructions carefully. Raw dry quinoa is not an instant food and should not be treated like a ready-to-eat grain.
Fresh vegetables, cooked grains, and prepared salads that require refrigeration are better suited to trips where you can keep them safely chilled.
When Should You Choose Dehydrated Curry?
Choose dehydrated curry when you want a warm dinner made from lightweight ingredients. Instant rice, properly dried vegetables, curry seasoning, and precooked dried lentils create a practical combination.
Use the amount of treated water required by the meal and follow its cooking instructions. Allow enough time for the thickest ingredients to soften fully.
Ordinary dried beans and other uncooked ingredients may need considerably more cooking than an instant backpacking meal.
A small portion of olive oil can improve the texture and increase the meal’s energy content. Add it after rehydration if you prefer to keep your dry ingredients separate.
Marconi Organic Extra Virgin Olive Oil – 0.38 Fl Oz (Pack of 100)
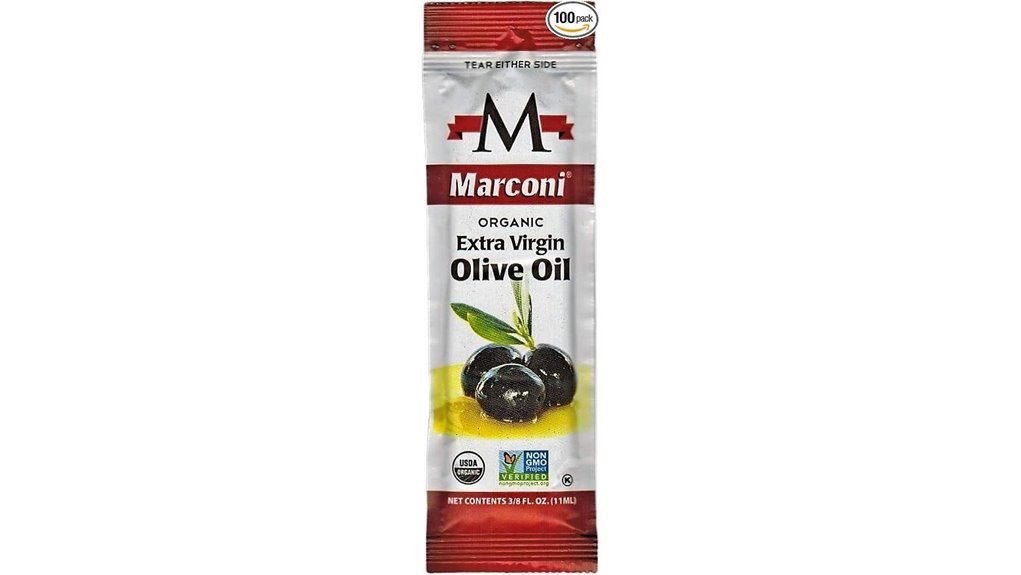
Marconi Organic Extra Virgin Olive Oil offers a convenient way to add flavor and calories to backpacking meals. The package contains 100 individual 0.38 fl oz portions, so you can pack only the amount needed for your trip.
Its classic extra virgin olive oil flavor works with quinoa salads, bread, instant rice, and simple camp dinners. It can also replace butter or another cooking oil in suitable recipes.
Olive oil supplies beneficial fatty acids and vitamins. More importantly for backpacking, it provides concentrated energy without requiring extra cooking water.
Use a packet to dress a cold quinoa salad or stir some oil into a finished curry. Packaging may vary, but the individual portions make meal planning straightforward.
Best For: Backpackers and campers who want portioned organic extra virgin olive oil for cold meals, simple cooking, and extra trail calories.
Pros:
- 100 individual 0.38 fl oz packets simplify portioning and packing.
- Useful for salads, bread, camp meals, and recipe substitutions.
- Adds flavor, beneficial fats, and concentrated energy.
- Does not require refrigeration before opening when stored according to its label.
Cons:
- Small packets are less convenient for larger group meals.
- Single-use packaging creates more waste than a reusable bottle.
- Offers a straightforward olive oil flavor rather than specialty seasonings.
- Individual packets still need protection from punctures inside a backpack.
Trail use: Pack the number of portions your meal plan requires instead of carrying the entire case. Keep unopened packets away from sharp cookware and pack out every empty wrapper.
NESCO FD-75A Snackmaster Pro Food Dehydrator
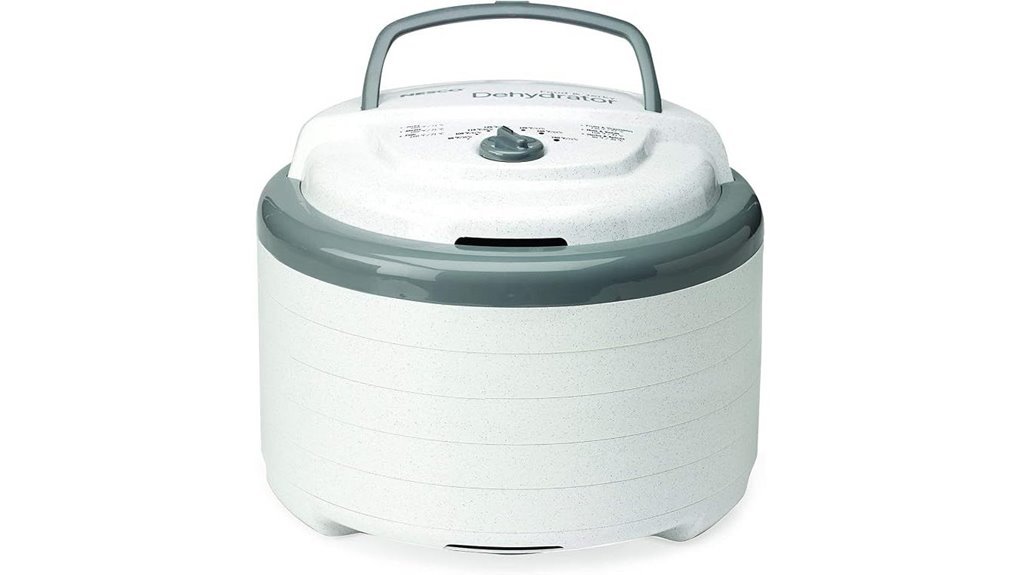
The NESCO FD-75A Snackmaster Pro is designed for preparing dried ingredients at home before a backpacking trip. It can help you turn fruit, vegetables, herbs, and properly prepared foods into compact trail ingredients.
The original model specifications describe five trays, expandable capacity, and a 600-watt heating system. Its Converga-Flow design circulates heated air across the trays to support even drying without routine tray rotation.
The top-mounted fan helps prevent liquids from dripping into the heating chamber. An adjustable temperature range of 95°F to 160°F supports different food-drying tasks.
Included accessories are described as fruit roll sheets, drying screens, seasoning packets, and a 52-page instruction and recipe guide. The original specifications also list a weight of approximately 3.5 kg and a one-year warranty.
NESCO’s official FD-75PR product information confirms similar features for the related model, including five expandable trays, 600 watts, and adjustable temperature control. Check the exact model number and included accessories before purchasing.
Best For: Backpackers, families, gardeners, and bulk-prep users who want to prepare dried fruits, vegetables, herbs, and other suitable foods at home.
Pros:
- Converga-Flow technology supports even drying without regular tray rotation.
- Expandable from five to 12 trays for larger preparation batches.
- Includes useful drying accessories and a recipe guide.
- Allows you to prepare individual ingredients for customized backpacking meals.
Cons:
- Five included trays may not provide enough capacity for large batches.
- The listed one-year warranty is relatively limited.
- Manufacturing includes imported components, which may matter to buyers seeking fully domestic production.
- Proper food preparation and storage are still required; a dehydrator does not automatically make every food shelf-stable.
Trail preparation tip: Dry suitable ingredients separately, allow them to cool, and pack them in moisture-resistant containers. Label each portion with its contents and preparation instructions.
The University of Minnesota’s food-drying guidance explains how drying conditions, moisture removal, cooling, and storage affect food quality and safety.
Easy Backpacking Meal Ideas for Different Trail Conditions
A practical backpacking menu combines quick meals, calorie-dense snacks, and food you will enjoy eating after physical activity. You do not need an elaborate recipe for every meal.
These combinations use familiar ingredients and can be adjusted for dietary preferences, available water, and cooking equipment.
1. Cold Quinoa Salad
Combine ready-to-eat quinoa with dried herbs, seeds, and olive oil. Add suitable shelf-stable vegetables or a packaged protein for more variety.
This works well for lunch because it requires little equipment. If using a dehydrated mix instead, follow its rehydration directions and use treated water.
2. Dehydrated Vegetable Curry
Pack properly dried vegetables, curry powder, instant rice, and precooked dried lentils. Add hot water according to the ingredients’ instructions and allow the meal to rehydrate completely.
Stir in olive oil before eating for extra energy and a richer texture.
3. Instant Oatmeal With Nuts and Dried Fruit
Instant oatmeal is a simple breakfast that can be made with hot water. Nuts, seeds, dried fruit, and powdered milk can add flavor and nutrients.
Pre-portion the ingredients at home so you only need to add the required water at camp.
4. Tortillas With Nut Butter
Tortillas and nut butter provide a convenient no-cook meal or snack. They work well when you need food that can be eaten during a short hiking break.
Add dried fruit or another shelf-stable ingredient for variety.
5. Instant Rice With Tuna and Seasoning
Use instant rice, a shelf-stable tuna pouch, and your preferred seasoning. Prepare the rice according to its instructions, then mix in the tuna.
Only open the tuna when you are ready to prepare the meal. Do not carry opened leftovers without proper refrigeration.
Factors to Consider When Choosing Backpacking Meal Ideas
The best backpacking meal ideas balance nutrition, carrying weight, preparation time, storage safety, and water needs. A lightweight meal is not useful if it leaves you hungry or requires more cooking equipment than you planned to bring.
Compare your entire daily menu rather than judging each food separately. Include breakfast, lunch, dinner, snacks, and a reasonable amount of extra food.
Calorie Density
Calorie density describes how much energy a food provides for its weight. It matters because you must carry enough fuel for hiking without adding unnecessary bulk to your backpack.
Fat provides approximately nine calories per gram, while carbohydrates and protein each provide about four. This makes oils, nuts, seeds, and nut butters useful additions to trail meals.
REI’s ultralight backpacking meal-planning guide recommends choosing foods with at least 100 calories per ounce, with 125 calories or more per ounce offering greater weight efficiency.
However, calorie density should not replace nutritional balance. A meal made entirely from oil would provide energy but lack the protein, carbohydrates, fiber, and other nutrients needed during a trip.
For example, adding olive oil and seeds to quinoa increases its energy content without requiring a much larger meal.
Pack Weight
Pack weight matters because every food item must be carried until you eat it. Start by estimating the amount of food needed for each day and then compare the total dry weight of your menu.
A commonly used planning range is approximately 1½ to 2½ pounds of food per person per day, depending on body size, hiking intensity, and trip length.
REI’s backpacking food-planning guidance also gives a broad daily energy range of 2,500 to 4,500 calories. Individual needs vary, so treat these figures as planning references rather than fixed requirements.
Freeze-dried and dehydrated foods reduce carried food weight by removing moisture. However, you must still obtain the water needed to prepare them.
Single-serving portions can simplify packing, while larger shared portions may reduce packaging waste for groups.
Consider nuts, energy bars, and other calorie-dense snacks for additional fuel without excessive bulk.
Prep Time
Choose meals that match the time and energy you expect to have at camp. Food requiring little preparation is especially useful after a long day of hiking.
Meals that can be prepared in under 15 minutes are convenient, although some dried ingredients need longer cooking or rehydration.
Precooked, dehydrated, and pre-portioned ingredients reduce work on the trail. Many packaged backpacking meals require only hot water and a short waiting period.
Cold meals can eliminate stove use entirely when the ingredients are suitable for no-cook preparation.
Prepare a simple menu before departure and label meal portions. This avoids searching through loose ingredients when you are tired or working in low light.
Shelf Stability
Shelf stability determines whether food can remain safe and suitable for your planned trip without refrigeration. It depends on the ingredients, preparation method, packaging, and storage conditions.
Commercial freeze-dried and dehydrated meals often offer long storage periods when kept sealed according to their labels. Check the manufacturer’s expiration or best-by date before packing.
Choosing food with at least six months of remaining shelf life can provide a useful planning buffer, although it is not a universal food-safety requirement.
Home-dried food needs extra care. Moisture-resistant packaging helps preserve quality, but drying alone does not guarantee that every prepared dish is safe for long-term room-temperature storage.
High-fat ingredients can develop unpleasant flavors as they age. Inspect their packaging and follow the recommended storage conditions.
Warning: Do not assume that cooked leftovers become shelf-stable simply because they have been placed in a dehydrator. Use established food-preservation procedures, and keep foods that require refrigeration safely chilled.
Cooking Simplicity
Simple cooking reduces the amount of equipment, fuel, and cleanup needed at camp. Meals that use one pot or a suitable food pouch are particularly convenient.
Dehydrated meals often require only hot water and time to rehydrate. Ready-to-eat foods can avoid cooking altogether.
Choose versatile ingredients that work in several meals. Olive oil, rice, tortillas, nuts, and dried vegetables can be used in different combinations without packing an extensive menu.
Remember that a dehydrator is a home-preparation appliance, not trail equipment. Its main benefit is helping you prepare lightweight ingredients before departure.
Nutrition Balance
Balanced backpacking meals should provide carbohydrates, protein, and fats alongside useful vitamins, minerals, and fiber.
Carbohydrates supply energy for physical activity. Protein supports muscle recovery, while fats provide concentrated calories.
For example, quinoa and dried vegetables provide a base for a meal. Seeds, nuts, a shelf-stable protein, or olive oil can make it more substantial.
Dried fruits and vegetables also provide variety and fiber, which can help maintain digestive regularity during longer trips.
Check sodium levels on packaged foods. Some salty foods can fit into an active hiking diet, especially when sweating heavily, but they should not replace adequate drinking water.
Seasoning with garlic powder, cumin, paprika, or curry powder can make simple meals more enjoyable without adding much weight.
Water Needs
Water planning must include drinking, cooking, rehydration, and cleanup. A lightweight dried meal still requires water before it can be eaten.
Many meals use approximately one to two cups of water per serving, although the correct amount depends on the ingredients and manufacturer instructions.
Daily drinking needs vary with activity, temperature, individual physiology, and hiking conditions. Do not rely on a fixed two- or three-liter allowance for every trip.
Plan where you can obtain water along your route and carry a suitable treatment method. The National Park Service provides backcountry water-treatment and health guidance, including boiling and filtration considerations.
Dehydrated food reduces the water initially carried inside the food, but it does not eliminate your need for preparation water.
If reliable water sources are limited, compare the weight of ready-to-eat meals with the additional water required by dried alternatives.
Cleanup Ease
Easy cleanup saves time and reduces the amount of water needed after dinner. Meals prepared in a single pot or suitable pouch generally create fewer dishes.
Resealable bags help organize ingredients and contain empty packaging until you can dispose of it properly.
Always carry a dedicated trash bag for wrappers, leftover food, and other waste.
Do not leave food scraps at camp or wash dishes directly in a stream or lake. Strain food particles from dishwater, pack them out, and dispose of wastewater according to local backcountry rules.
Single-serving packaging offers convenience but creates more waste than some reusable containers. Choose the approach that fits your trip while following Leave No Trace practices.
How to Prepare Dehydrated Backpacking Meals Safely
Making your own dried meals can give you more control over flavor, ingredients, and portion size. However, preparation and storage methods must suit the specific foods you use.
A food dehydrator removes moisture, but it does not replace cooking, safe handling, or proper packaging.
- Choose suitable ingredients. Start with foods that have established home-drying instructions, such as appropriate fruits, vegetables, and herbs.
- Prepare food properly. Wash produce and follow recommended preparation and blanching instructions where applicable.
- Arrange food evenly. Spread ingredients across the dehydrator trays without overcrowding them.
- Use the appropriate temperature. Follow the appliance instructions and food-specific preservation guidance.
- Check dryness. Make sure the food reaches the recommended texture and moisture level before storage.
- Cool and package. Allow dried ingredients to cool before sealing them in suitable moisture-resistant containers.
- Store correctly. Keep food in appropriate conditions and follow the recommended storage period.
- Test the finished meal. Prepare a portion at home using the same method you plan to use on the trail.
What About Homemade Jerky?
Homemade jerky requires specific safety steps because dehydration alone may not destroy harmful bacteria in raw meat or poultry.
According to the USDA’s jerky safety guidance, meat should reach 160°F and poultry should reach 165°F before dehydration. The food must then be dried under suitable controlled conditions.
Use a food thermometer rather than relying on the dehydrator’s temperature dial to confirm the required internal temperature.
Can You Carry Freshly Prepared Meals Without Refrigeration?
Freshly prepared meals containing perishable ingredients need temperature control. Ordinary packaging does not make cooked grains, meat, dairy, or prepared salads shelf-stable.
The USDA’s hiking and camping food-safety guidance recommends shelf-stable foods for longer trips when refrigeration is unavailable.
Use commercially shelf-stable products according to their labels or carry perishable meals with an appropriate cold source.
Frequently Asked Questions
How Do I Prevent Backpacking Meals From Freezing Overnight?
Pack moisture-containing meals in insulated containers and avoid exposing them unnecessarily to freezing temperatures. Freeze-dried ingredients are less affected before rehydration. Store all food securely overnight according to local wildlife rules rather than keeping it inside your sleeping bag or tent.
What Spices Improve Trail Meals Without Adding Much Weight?
Smoked paprika, garlic powder, chili flakes, cumin, curry powder, and cinnamon add flavor without much weight. Pack small portions in sealed containers. Curry powder works well with rice and vegetables, while cinnamon suits oatmeal and dried fruit.
How Can I Reduce Meal Prep Time Before a Long Hike?
Prepare your menu in advance, portion suitable ingredients, and label each meal. Use ready-to-eat or properly dehydrated foods where practical. Keep preparation instructions with the portions so you know how much water and cooking time each meal requires.
Which Utensils Are Best for Eating Dehydrated Backpacking Meals?
A lightweight, long-handled spoon is convenient for eating directly from deep meal pouches. A titanium spork is another compact option. Choose a utensil that reaches the bottom of your food container and is easy to clean after use.
How Do I Pack Meals to Avoid Crushing Them in a Backpack?
Place fragile meals in suitable hard-sided containers or protective sacks, with softer items providing padding. Keep heavier food near the pack’s center for balance. Label individual portions and protect sealed packets from sharp objects that could puncture them.
Can You Eat Dehydrated Backpacking Meals Without Cooking?
Some dehydrated meals can be prepared with cold water if their ingredients and instructions allow it. This method is called cold soaking. Ordinary raw grains and beans may still require cooking, so use foods specifically suited to your chosen preparation method.
How Much Food Should You Pack for a Backpacking Trip?
A common planning range is 1½ to 2½ pounds of food per person per day, depending on activity and energy needs. Calculate your meals and snacks for the full trip, then include some extra food for unexpected delays.
Conclusion
Quinoa salad packets and dehydrated curry meals offer different ways to keep backpacking food practical. A ready-to-eat quinoa salad works well when you want a fast, cool meal, while dehydrated curry provides a warm dinner with compact ingredients.
Marconi olive oil packets can add flavor and concentrated energy, while the NESCO dehydrator offers a way to prepare suitable trail ingredients at home.
Build your menu around the calories you need, the water available, safe storage, and the amount of cooking you want to do. Test your meal combinations before departure so you know they are satisfying and easy to prepare.
Sources
- REI: Backpacking Food Ideas and Meal Planning: Daily food quantities, energy requirements, and meal planning.
- REI: Meal Planning for Ultralight Backpacking: Calorie density, lightweight foods, and meal preparation.
- NESCO: FD-75PR Snackmaster Pro: Specifications for the related dehydrator model.
- University of Minnesota Extension: Drying Food: Home dehydration, moisture removal, packaging, and storage.
- USDA: Jerky and Food Safety: Safe preparation and dehydration of meat and poultry.
- USDA: Food Safety While Hiking and Camping: Safe food selection, handling, and refrigeration.
- National Park Service: Backcountry Health: Water treatment and backcountry food safety.
- National Park Service: Food Storage While Backpacking: Wildlife-safe food storage and bear-resistant containers.